Kling O1: Complete AI Video and Image Guide
Most AI video tools ask you to pick one thing and do it well. Kling O1 does five. Released on December 2, 2025 as Kuaishou's first unified multimodal model, it covers image editing, image to video animation, reference-based video generation, reference image to video with element tagging, and natural-language video editing all within the same model family, all on Eachlabs. That breadth is the point. Before models like Kling O1, a creator working on a short film might use one tool to edit a chara
Most AI video tools ask you to pick one thing and do it well. Kling O1 does five. Released on December 2, 2025 as Kuaishou's first unified multimodal model, it covers image editing, image to video animation, reference-based video generation, reference image to video with element tagging, and natural-language video editing all within the same model family, all on Eachlabs.
That breadth is the point. Before models like Kling O1, a creator working on a short film might use one tool to edit a character image, a different tool to animate it, and yet another tool to extend the resulting footage or edit it for a new scene. Each tool introduces its own quality ceiling, its own workflow, its own inconsistencies. Kling O1 collapses that into a single architecture where the same subject identity, the same visual logic, and the same cinematic language carry through every step of the production. It is not five separate tools with a shared name. It is one system you move through depending on what the work requires.
What Is Kling O1?
Kling O1 is the first model in Omni 1 family released before the O3 generation that followed. The "Omni" designation reflects the architecture's core ambition: unified multimodal processing across text, images, and video in a single semantic space.
The model family on Eachlabs covers five distinct modes. The image editing mode takes a text prompt and up to ten reference images to perform precise, localized transformations on still images. The image to video mode animates between a start frame and an optional end frame with text-guided direction. The video to video reference mode generates new shots guided by an existing reference clip, preserving its cinematic language. The reference image to video mode takes up to seven images and up to three element tags to produce animated video with exceptionally stable multi-character and multi-object identity. And the video to video edit mode accepts existing footage and a natural-language instruction to transform subjects, environments, or visual style while keeping the original motion intact.
Each mode has its own dedicated page on Eachlabs with its own playground and API access. They share the same underlying architecture and the same commitment to structural consistency which is what makes them actually useful in sequence rather than in isolation.
Image Editing Mode
The image editing mode is where the Kling O1 family starts. Released on December 2, 2025, it supports up to ten reference images simultaneously, which is a genuinely unusual capability. Most image editing models accept one or two reference inputs. Ten means you can provide a character from multiple angles, a style reference image, an environment reference, and a product detail shot — all at once and have the model synthesize a coherent output that respects all of them.
The core capability is precise, localized editing while preserving overall composition. You can change a character's clothing without affecting the background. You can shift the lighting on a product without altering its shape. You can apply a style reference without losing the subject's identity. The example prompt on the Eachlabs page - "Put @Image1 on the horse in @Image2" — illustrates the directness of this control. Two images, one instruction, and the model handles the spatial reasoning required to make that composition work.
Output resolution goes up to 1080p. The model supports both text-to-image and image-to-image workflows, with iterative editing being the recommended approach for complex transformations start with the broad change, then refine the details in subsequent passes. For e-commerce product editing, character design iteration, branded content creation, and comic series production, this is one of the more controllable image transformation tools available.
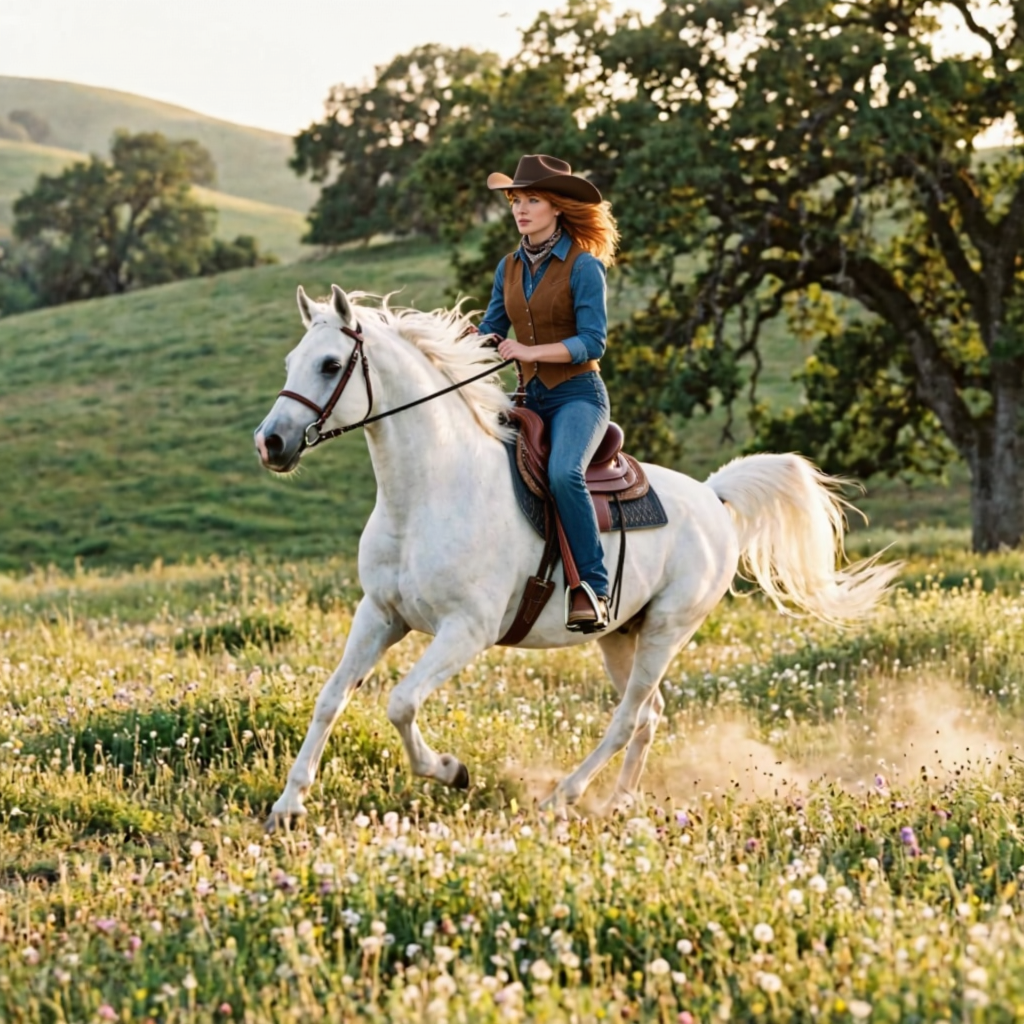
Image to Video Mode
The image to video mode specializes in structured animation: you give it a start frame, an optional end frame, and a text prompt describing the visual direction, and it generates the motion in between. Average run time is 100 seconds, which is fast enough for genuine iteration.
What makes this mode distinctive is the dual-frame conditioning. Most image-to-video tools animate from a single starting image, which means the end of your clip is left entirely to the model's interpretation. Providing an end frame gives you compositional control over both endpoints of the animation. The model's job becomes filling in the motion between two defined visual states — which is both a creative constraint and a practical one. You know exactly where the clip starts and where it resolves.
The example prompt on the Eachlabs page shows what this looks like in practice: a summer-to-winter seasonal transition of a Paris street scene, same camera angle throughout, light shifting from golden hour to night, trees going bare, snow accumulating, the Eiffel Tower lighting up. That is a complex temporal transformation described in text, anchored by two specific frame states. Kling O1 handles the interpolation.
For filmmakers bridging keyframes, for product teams generating 360-degree rotations from two defined angles, for content creators wanting to control exactly how a scene opens and closes this mode provides that structure. Clip length runs from 3 to 10 seconds with an average run time of 100 seconds.
Kling O1 image to video animates a cinematic Paris summer scene from a single start frame golden hour light over the Eiffel Tower, pedestrians in motion, a vintage car passing through with the model generating natural movement and scene depth across a 5-second clip guided by text direction alone.
Video to Video Reference Mode
The video to video reference mode takes a different starting point entirely. Instead of beginning from a static image, you provide an existing video clip as the reference and the model generates a new shot that continues or builds on it while preserving the same cinematic language the motion dynamics, the camera framing, the visual style.
Average run time here is 180 seconds. Reference videos should be between 3 and 10 seconds. The model accepts up to four additional image references and up to three element tags alongside the video input, which opens up multi-modal generation where character or object identities are locked through images while the motion and camera logic is inherited from the video reference.
The example prompt on the Eachlabs page is minimal by design: "Based on @Video1, generate the next shot. Keep the style of the video." That simplicity is the point. The reference clip communicates the cinematic intent; the prompt just tells the model what to do with it. More directive prompts — specifying camera movement, environment changes, or scene continuation logic — work well too, but the model is designed to read visual language from the reference rather than rely entirely on the prompt.
Indie filmmakers extending scenes, marketers creating brand transitions, developers building AI video extension tools, animators applying stylization to existing footage this mode serves all of these. The key requirement is that your reference video is clean, stable, and shot with intentional cinematography. The model inherits what you give it.
Kling O1 generates a new shot that inherits the motion dynamics, camera framing, and visual style of a reference clip scene continuity preserved without manual key framing or post-production assembly.
Reference Image to Video Mode
The reference image to video mode is the most complex of the five. Average run time is 250 seconds. It accepts up to seven image references, up to three element tags using @Element syntax, a start frame, an end frame, and a detailed text prompt all as simultaneous inputs that the model processes together rather than sequentially.
The example prompt on the Eachlabs page gives a sense of what this enables: a multi-shot yacht sequence that begins with an aerial view, descends toward the deck, introduces a character via @Element1, matches the color palette of a referenced @Image2 as the camera reaches her face, then reveals @Element2 — a vintage Polaroid camera in a cinematic close-up. That is a complete mini-production described in one prompt, with specific characters and objects anchored by image references throughout.
Kling O1 animates a multi-element scene from reference images character identity, object detail, and environment locked through @Element tagging across every frame of the generated sequence.
The @Element tagging system is what makes multi-character consistency tractable. You define each subject with a reference image, tag them in the prompt by name, and the model maintains their visual identity throughout the generated clip regardless of camera angle, lighting changes, or scene transitions. This is the mode to use when you need multiple distinct subjects to remain visually stable across a sequence that involves real movement and camera work.
Start and end frame conditioning applies here too, giving you compositional control over how the clip opens and resolves. The combination of element tagging, multi-reference image support, and dual-frame conditioning makes this the Kling O1 mode with the highest ceiling for production complexity — and the one that rewards the most thoughtful prompt preparation.
Video to Video Edit Mode
The video to video edit mode is fundamentally different from the other four. It does not generate new footage. It edits existing footage. You bring a video clip, a natural-language instruction, and optional reference images for style guidance — and the model transforms the visual content while preserving the original motion structure and timing.
Average run time is 280 seconds. Input videos should be between 6 and 20 seconds, up to 100MB, in MP4, MOV, WebM, or AVI formats. Up to ten additional image references and up to three elements can be provided. The Keep Audio option lets you preserve the original sound track through the transformation.
The example prompt "Replace the character in the video with @Element1, maintaining the same movements and camera angles" illustrates the core use case. You have footage. You want a different subject in it. The motion, the camera, the timing all preserved. Only the visual content of the subject changes. For reshoots that would otherwise require booking talent again, for campaign variants that need the same action with a different character, for style transfers that need to retain the original performance this is the tool.
Kling O1 transforms a subject in existing footage using a single natural-language instruction — original body movement, camera angles, and scene timing stay intact while the character and environment are replaced entirely.
Broader transformations work too: environmental changes like day to night, weather shifts, background replacements, style transfers to cinematic, anime, or painterly aesthetics. The model applies these transformations consistently across frames rather than frame-by-frame, which is what produces temporal coherence instead of flickering inconsistency.
How the Five Models Work Together
The value of Kling O1 as a family rather than five separate tools becomes clearest when you think about a production workflow rather than a single generation task.
You might start in the image editing mode to develop a character design iterating through clothing, lighting, and style variations until you have a reference image you are satisfied with. That reference image then feeds directly into the reference image to video mode, where you use it as an @Element to anchor your character's identity in a generated video sequence. If you want to extend that sequence with a continuation shot that matches its cinematic language, the video to video reference mode picks up from where you left off. And if you realize the environment needs to change the time of day is wrong, or the background does not fit the video to video edit mode lets you apply that transformation without reshooting the performance.
That is a complete production pipeline. Same subject identity throughout. Same visual quality standard. Same platform.
Real World Use Cases
The five-mode structure of Kling O1 covers more production scenarios than any single mode could address.
Film and commercial production uses image editing mode for character and product design iteration, image to video mode for scene animation and transitions, and video to video edit mode for environment changes and restyling without reshoots.
Brand and marketing teams use reference image to video mode to produce consistent character-driven content across campaign variations, and video to video reference mode to extend existing brand footage into new shots that match the original cinematic feel.
Game developers use the image editing mode to iterate on character art and the reference image to video mode to animate those characters into short cinematic sequences for trailers, cutscenes, and pitches.
Content creators building virtual influencer content use reference image to video mode for its element tagging system multiple characters, stable identity across clips, controlled camera work to produce a consistent visual presence without requiring expensive production setups.
Developers building AI video applications on Eachlabs integrate across multiple modes depending on the workflow their users need, using the consistent API structure across all five modes to manage the integrations without managing five separate systems.
How to Use Kling O1 on Eachlabs
All five Kling O1 models are accessible through the Playground and API on Eachlabs. The playground for each mode shows the input structure clearly and includes example prompts and outputs that demonstrate the model's capabilities.
For image editing, provide reference images and a prompt describing the transformation. Referencing input images by tag (@Image1, @Image2) in the prompt is essential — the model treats untagged images as loose style hints rather than identity anchors.
For image to video, provide your start frame and write a prompt that specifies motion direction, camera behavior, lighting, and style. Add an end frame if you want to define where the clip resolves.
For video to video reference, upload a clean 3-10 second reference clip and write a prompt that describes the continuation or variation you want. Be specific about camera behavior and scene direction.
For reference image to video, define your elements with clear frontal reference images, tag them in the prompt explicitly, and write the camera and scene direction in the same structured, directorial language that works across all five modes.
For video to video edit, upload your source footage and write a clear, specific transformation instruction. Reference any element or style images you are providing, and toggle Keep Audio on if you want the original sound to carry through.
Tips for Getting the Best Results
Always Tag Your References in the Prompt
Across all five modes, the difference between a reference image being treated as an identity anchor versus a loose style suggestion comes down to whether you tag it in the prompt. @Image1, @Element1, @Video1 — use these tags explicitly in the text and reference what each one contributes to the scene. Without the tags, the model may ignore the reference or blend it ambiguously with other inputs.
Match Reference Quality to Output Expectations
Clean, well-lit, high-resolution references produce better outputs across all five modes. This matters most for character and product identity — a blurry portrait or a heavily compressed source video gives the model less reliable visual data, which shows up as less stable identity in the generated output. Treat reference materials with the same care as production assets.
Write Prompts Like Scene Briefs
Every mode responds to directorial language: subject, action, camera movement, lighting quality, atmosphere. "Camera descends slowly toward the character as she turns her head, warm golden hour light from the left" is more useful than "cinematic video of character." Short, specific, concrete — that is the prompt style that works.
Iterate Short Before Going Long
The reference image to video mode runs at an average of 250 seconds and the video edit mode at 280 seconds. For any new combination of references, elements, and prompt structure, test at the shortest duration first. A 5-second test generation tells you whether your inputs are producing the right result before you commit to a full-length clip.
Use Modes in Sequence
The clearest advantage of working within a single model family is that output from one mode can feed directly into the next. An image edited in the image editing mode can become a start frame in the image to video mode. A video generated in reference image to video mode can be extended via the video to video reference mode. Think about the workflow first, then choose which mode you are at in that workflow.
Wrapping Up
Kling O1 is five tools that work like one. Image editing, image to video, video extension from a reference, reference-anchored multi-character animation, and natural-language video editing all sharing the same architecture, the same identity consistency, and the same production quality standard. Whether you are iterating on a character design, animating a complex multi-subject scene, or restyling existing footage for a new campaign, Kling O1 has a mode for it. Try all five on Eachlabs and find where your workflow fits.
Frequently Asked Questions
What are the five modes of Kling O1 and what is each one for?
Kling O1 covers five distinct generation and editing modes on Eachlabs. The image editing mode performs precise, localized transformations on still images with up to ten reference inputs. The image to video mode animates between a start and optional end frame with text-guided direction. The video to video reference mode generates new shots that match the cinematic language of a reference clip. The reference image to video mode produces complex multi-subject animated sequences from up to seven image references with element tagging. And the video to video edit mode transforms existing footage using natural-language instructions while preserving the original motion.
How does the @Element tagging system work in Kling O1?
In the reference image to video mode, you can define up to three subjects by uploading their reference images and tagging them in the prompt using @Element1, @Element2, or @Element3. The model uses those tags to identify which reference image corresponds to which subject in the scene, maintaining that subject's visual identity face, proportions, clothing throughout the generated clip. Tagging is essential: without explicit tags in the prompt text, the model may treat uploaded images as loose style hints rather than binding identity anchors. The same tagging logic applies in the video to video edit mode when introducing a new character via @Element reference.
Can I use Kling O1 modes in sequence within the same production workflow?
That is exactly what the model family is designed for. Output from the image editing mode can serve as the start frame in the image to video mode. A clip generated in the reference image to video mode can be extended or restyled using the video to video reference or edit modes. Because all five modes share the same underlying architecture and identity consistency standards, visual quality and character appearance carry forward reliably from one mode to the next. Planning your production as a sequence of Kling O1 modes rather than as isolated generations is what gets the most out of the family.